Free Delivery
on all UK & Ireland orders
on all UK & Ireland orders
on all UK & Ireland orders
on all UK & Ireland orders

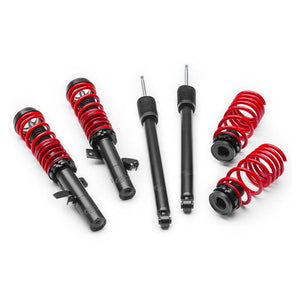
For those that are new to coilovers, an obvious question you may ask yourself is ”how do I make sure my ride height is set even?“ While there is no real science to it, there are some things to take into consideration and to keep in mind when adjusting the coilovers once installed. Let’s go over a few things that will help you get set-up and back on the road.
We often get asked where do I even start once the coilovers are on. We have seen in many ways, but the two most popular starting points would be to start with the spring halfway up the shock body or start with the spring at the bottom of the adjustment. Once you set the vehicle on the ground you can then get an idea if you need to go up or down based on where you start the spring height at. For something getting a decent drop we typically opt for starting at the lower portion of the shock as that often leads to less adjusting after we’ve set it on the ground.
As mentioned, getting ride height set isn’t rocket science. You’ll simply be using a measuring tape to dial it in. This will ensure you can get a good starting point side to side. In this step, we typically recommend measuring the exposed threads left on the coilover rather than your wheel gap or distance between fender and ground. This has proven to give a better starting point for us personally. Match up both fronts to the same adjustment and then match up both rears to the same adjustment. The front and rear often will not match each other.
Once you have measured your starting point set the vehicle on the ground. Roll the car back and forth to ensure the springs and shocks settle. From there you can get an idea if you need to go up or down from your initial setting. Make note for each corner.
We have been doing this for years and I could probably count on one hand how many times we nail ride height on the first try. We’re often very close but typically need to do minor adjusting after the initial setting to get it perfect. This means you may have to adjust the collars a few times before it is dialed exactly where you want it. Using the notes made when the vehicle was on the ground, make the appropriate adjustments and set it down on the ground again. Repeat this as many times as needed until ride height is achieved.
While the steps to setup ride height aren’t too difficult there are some things to keep in mind. Let’s go over those things...
So, not too difficult. If you need more help on the technique to adjusting the coilovers check out our blog post and video on that here. If you have other questions not covered here, feel free to give us a call and one our technicians would be happy to walk you through the process, +44 28 276 63911.

Leave a comment